How to Hang a Plant From the Ceiling: A Simple, Secure DIY
Hanging plants are a great way to add some greenery without taking up floor or counter space. We wanted to hang one in our house, but also wanted it to look good and have a mounting system we could feel good about.
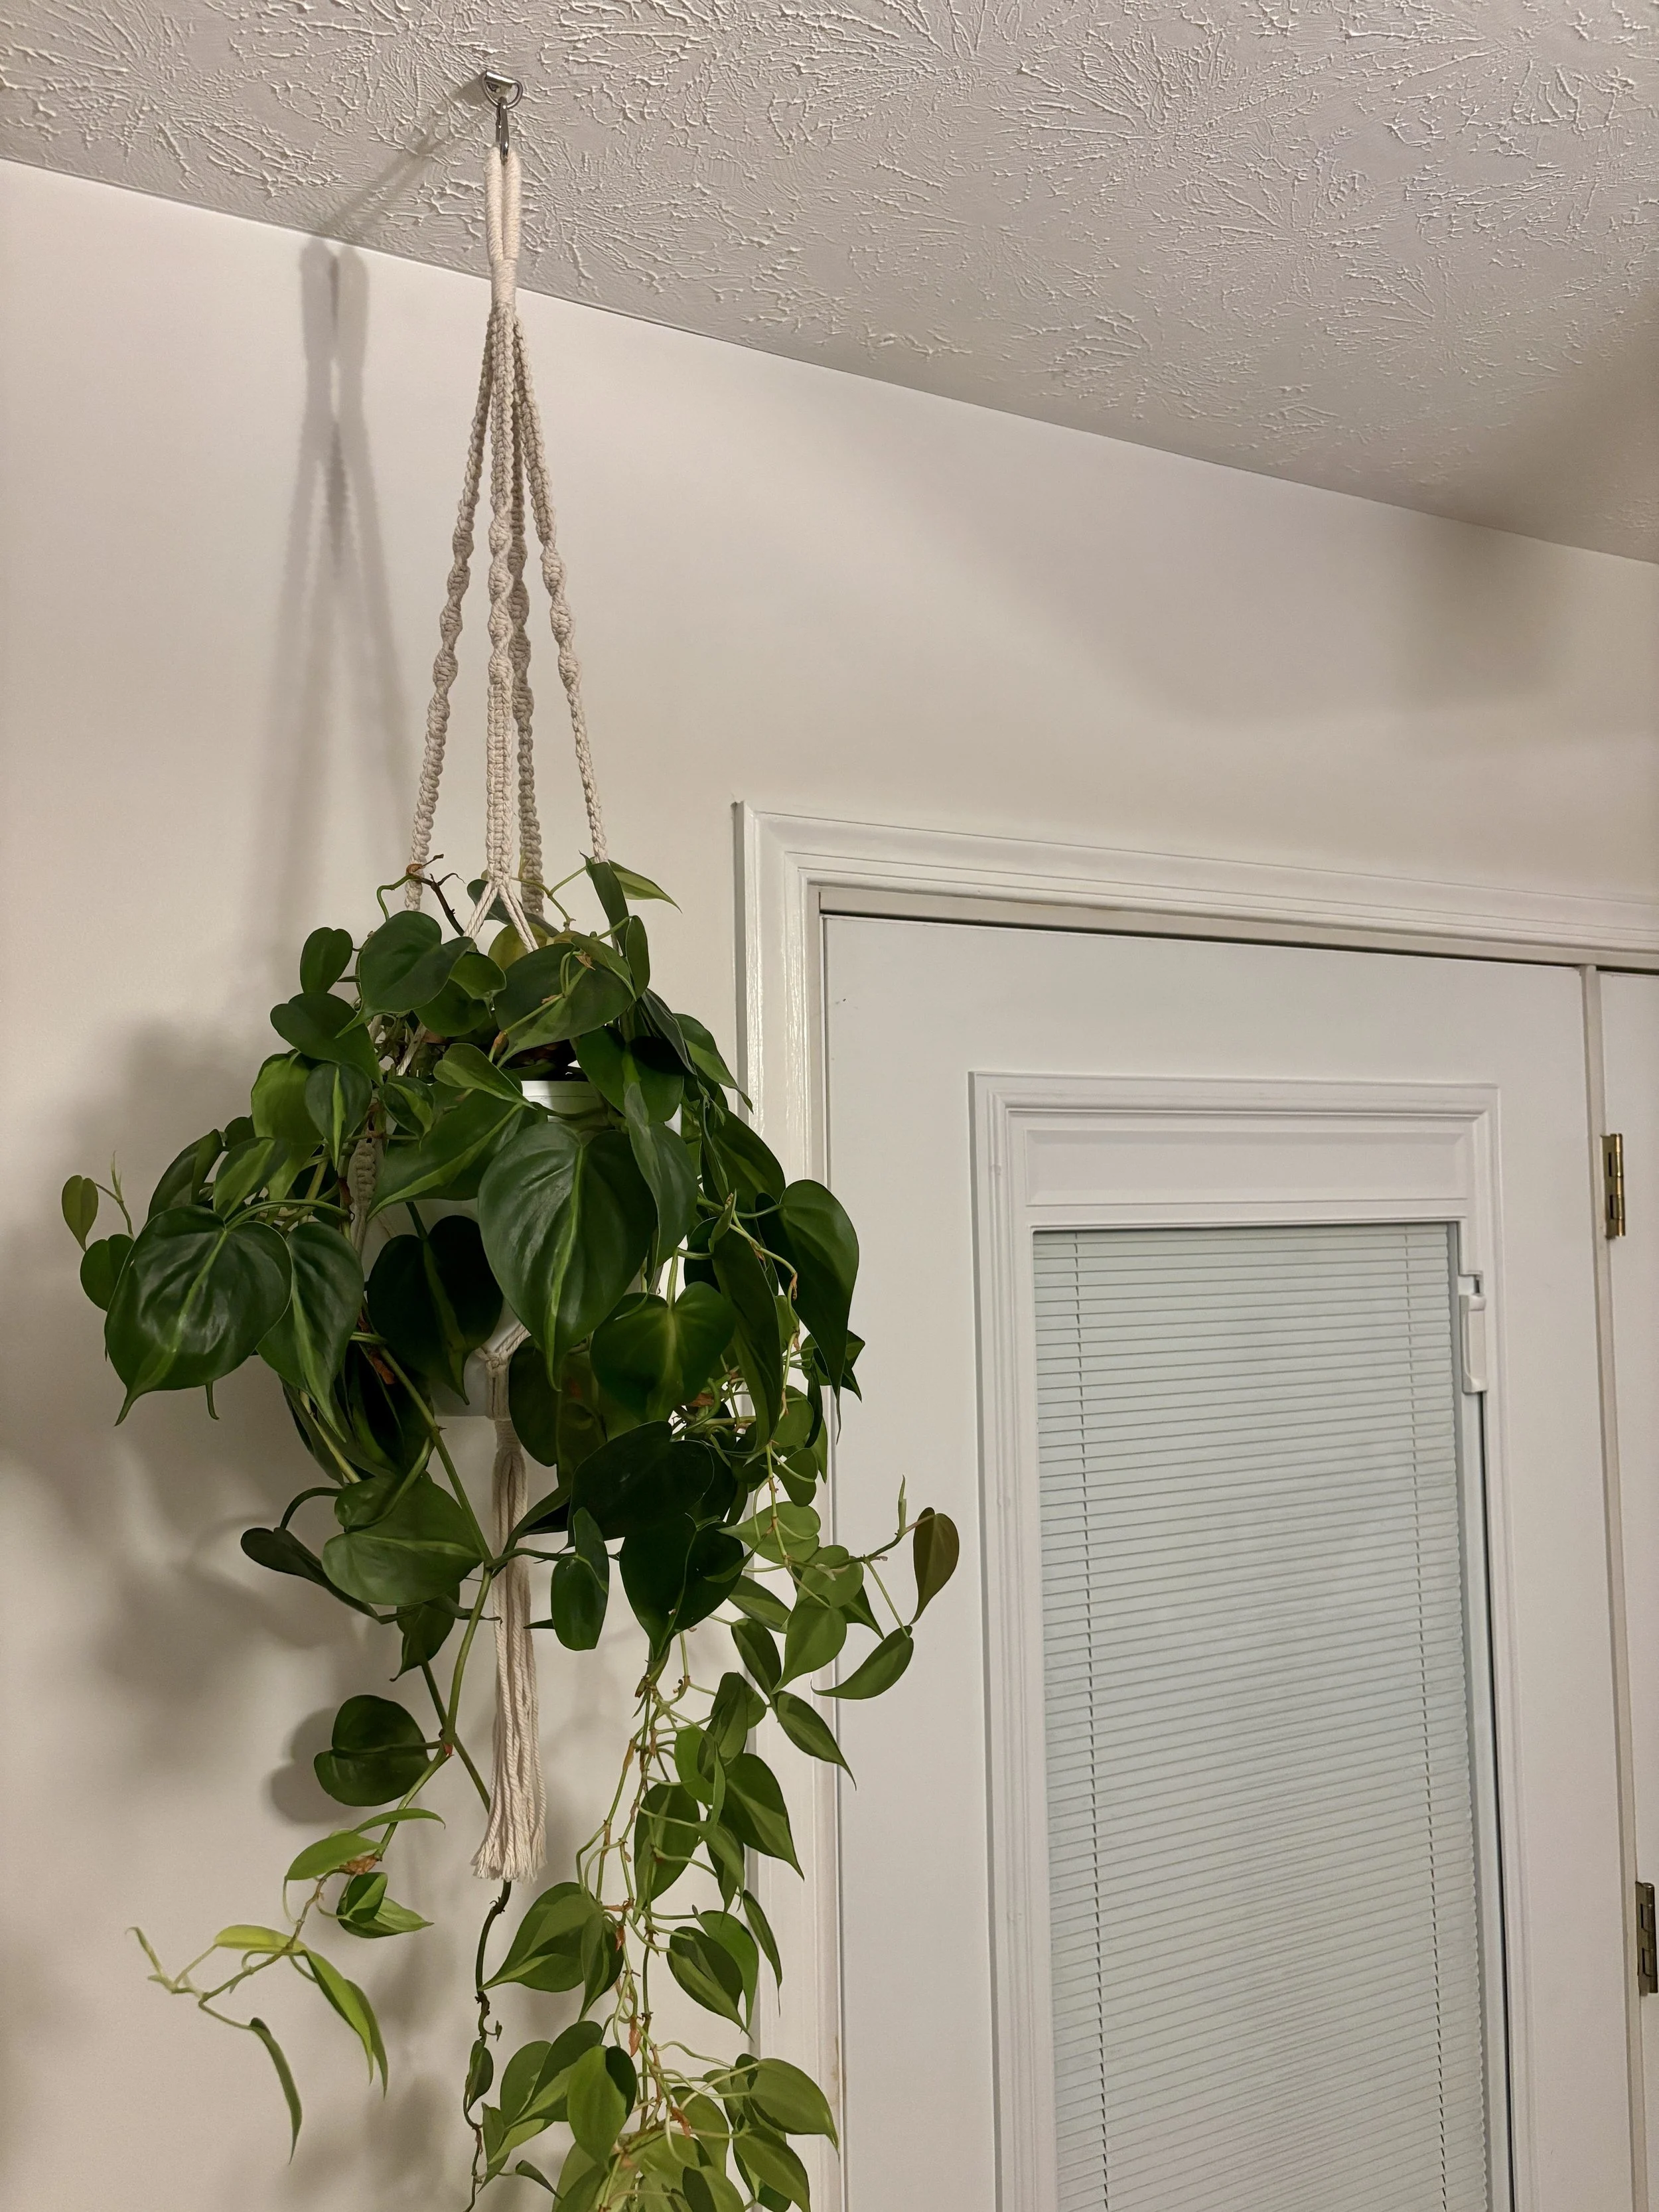
The solution ended up being pretty simple: a cotton macramé plant hanger, a self-watering planter, and a D-ring mounted with a Toggler drywall anchor.
The whole setup looks clean once it’s installed, and the mounting hardware is mostly hidden by the rope.
What You’ll Need
Here are the components I used:
Macrame Plant Hanger - patterned cotton rope gives it a much nicer finished look than a basic hook. https://amzn.to/3UOlhlb
Self-watering Planter - These are attractive looking and reduce how often you have to water. Be sure to select the pot diameter and color that make the most sense for your plant and space. https://amzn.to/3UcvV5a
D Rings - These provide a simple attachment point for the hanger. These ones are nickel plated steel and thick gauge and have a screw hole large enough for the anchors suggested below. https://amzn.to/3SmK3Z4
Carabiner Clips - These make connecting the macrame plant hanger to the D-ring really easy and strong. https://amzn.to/4geiydf
Drywall Anchors - used to secure the D-ring where a ceiling joist isn’t available. These toggler brand snaptoggles are great for ceiling installs and I also use them for higher load wall applications. They have a larger area of drywall engaged to help distribute load. https://amzn.to/4zzwFl2
Wood screws - We use this style of stainless screw for all sorts of indoor and outdoor projects in different lengths. This 2-1/2” works well in studs and joists. https://amzn.to/4geBd8X
Tools needed:
Drill and bits
Screwdriver
Stud finder
A Quick Note About Weight
A hanging planter isn’t just the weight of the empty pot. You need to account for the planter + soil + plant + water. A self-watering pot can be particularly heavy when the reservoir is full.
If you can position the plant directly under a ceiling joist, that’s my preferred installation. If you can’t, use an anchor specifically appropriate for your ceiling material and installation. Don’t simply look at the biggest weight number printed on an anchor package. Anchor capacity depends on the material, installation method, and direction of the load. most drywall anchors are designed for shear load (wall hanging installation) not straight tensile load (ceiling hanging installation). I recommend the toggler style since they distribute the load over a much larger section of drywall for ceiling mount. I still wouldn’t hang a 75lb 5 gal pot though!
For a lightweight plant, this is a relatively simple project. For a large, heavy planter, I’d use a more substantial mounting method.
Step 1: Choose Your Location
Start by deciding where you want the plant.
Think about:
How much light the plant needs
Clearance from doors and walkways
How large the plant will eventually become
Whether you’ll be able to reach it for watering
The total loaded weight of the planter
We also recommend holding the planter approximately where you think you want it before drilling anything. It’s much easier to move a pencil mark than a hole in the ceiling. Your tired arm is worth it.
Step 2: Install the Anchor and D-Ring
Once you’ve picked the location, mark the mounting point.
If you’re able to hit a ceiling joist, use an appropriate screw/hardware for the joist like the one we linked above. Be sure to check with stud finder and then check for sawdust from a pilot drill hole before installing your screw.
For my installation, I used the Toggler anchors linked above since a joist wasn’t available at the location I wanted.
Install the anchor according to the manufacturer’s instructions, then attach the D-ring. If you’re using the Toggler anchor, put the plastic anchor in first, then put the bolt through the D-ring, then install the bolt in to the plastic anchor.
The D-ring together with a carabiner gives the macramé hanger a small, clean attachment point without needing a bulky ceiling hook.
Step 3: Put the Planter in the Hanger
Before putting it overhead, assemble the planter and macramé hanger on the floor.
Make sure the pot sits evenly and that the supporting cords are distributed around the planter.
This is also a good time to check that the top loop is centered.
I prefer doing this part on the ground rather than trying to troubleshoot an uneven planter while standing underneath it.
Step 4: Hang the Plant
Once everything looks good, place the loop of the macramé hanger through a carabiner clip. Then clip the carabiner through the D-ring.
Check that the planter is sitting level and that the load is being distributed evenly through the hanger.
Then step back, take a look, and enjoy!
The Finished Result
What I like about this setup is that it doesn’t really look like a DIY mounting project.
The patterned cotton rope adds some visual interest, while the planter and mounting hardware stay relatively simple.
It’s also a good way to add a plant to a room when you’re already short on shelf and floor space.
Good luck with your project!
As an Amazon Associate, I earn from qualifying purchases.
